This was my very first project all on my own. One that has sent me into an awesome makeover journey. New into my grief I was feeling a little scared (ok maybe a lot) and a little excited. I was dubious of my own abilities, my late husband was so super handy and everything he touched was gold – but in a true wave of optimistic skepticism I said hey I can do this. I figured if it turned out badly I’d just scrap it and no one would ever know…
My eye was continually drawn on Pinterest to distressed pieces and old fashioned looking drawer pulls. The best and easiest paint to distress, plus widely popular, is of course Chalk Paint! A trip to Micheal’s and I found French Teal Folkart chalk paint. It’s inexpensive and, after using now on multiple projects, I’ve found it performs great.
I wanted this piece to look old. I took a deep breath and headed out to my late husbands shop – honestly I think of this entire project THIS took the most courage. Rummaging around his show and the yard I found an old board in the back yard that was already fairly beat up and just so happened to be already painted black! Bonus! Use what you have – best way to save money. Now I was feeling the excitement.
In the spirit of saving money, best places Ever (IMO) – Junk shops! They are my favorite place to find things like drawer pulls. If you are a procrastinating projectionist (ahem, me) I suggest finding the board before finding your door pulls – it makes using what you have on hand Much easier then having to give something up. Example, if the board you find is too short to fit the perfect set of 6 drawer pulls you found, then you decide not to use the board and then you hunt and hunt forever to get the best board and then the drawer pulls sit in a drawer and a year later you still haven’t done the project – OR you go and buy NEW door pulls to fit the board…..phew True talk.
Now the dirty details – click to skip.
Step One – Find a board
Get creative with this. Look around outside, if a board is old and dirty a quick brush off and sanding will clean it right up. Look in your closets and your attic. Look at old furniture that could be repurposed. If you don’t have anything, head off to your trusty home supply store, in my case Home Depot. Check their wood scrap bin to see if you hit gold and last, but not least, just buy a board.
Step Two – Cut the board
We went hunting for anything that can be used, so we work with what we have but boards are made to be cut. Is the board the length you want it to be or is it too long? My board was long, I cut it to the size I wanted. If your board is perfect then Bonus! You get to skip to step three (but you don’t pass go or collect $200 dollars, sorry).
To cut your board the easiest way is to use a circular saw. Measure and Mark your board – at least twice or 5 times! This can be done two ways. Using a measuring tape measure the space it will go and how long you want it to be. Measure that length from the edge of the board. You can also ‘cheat’ if you don’t have a measuring tape, or are too lazy to dig it out, just hold your board up to the wall and mark with a pencil where you want it to be cut. I say pencil a lot but honestly you can use a pen, marker (just watch so you can cover the mark), scratch it or put a piece of tape – anything to mark the spot.
**TIP** Measure and Mark your boards twice (or 5 times), cut once – ALWAYS. Trust me on this, even if you’re feeling confident.
Get your circular saw. Place your board on a sturdy surface with an overhang. For example, I have an old metal bedside table in my shop that is perfect for this. Place the board on the table, slide the end of the board off of the table with the mark off of the table, make sure everything is clear from under and around the board where you will be cutting. Keeping your finger off of the saw trigger, place your saw in place on your mark, hold your board down firmly with your left hand. Do a mental check – Fingers, Toes, Legs, Cord – check that each of these is No Where near the saw. Press the trigger and slowly push the saw flush and forward, letting the saw do the work.
**TIP** Before putting your finger on Any saw trigger (skill, circular, chain, table) always do a mental check – Fingers, Toes, Legs, Cord – are they clear of the saw?
Step Three – Paint the base color
Decide if you want to use black as your peek through color or get creative with red on green or gold on red, yellow on black – the combinations are endless! I resprayed my fresh cut end black. I decided to get creative and added a few random sprays of silver metalic.
Spray paint will be the quickest and easiest but you can absolutely use chalk paint. Chalk paint goes so far! You’ll use one small 2 oz Folkart Chalk Paint to cover your base. Brush or spray the base color evenly – don’t worry about the back! Let it dry.
Step Four – Beat the board
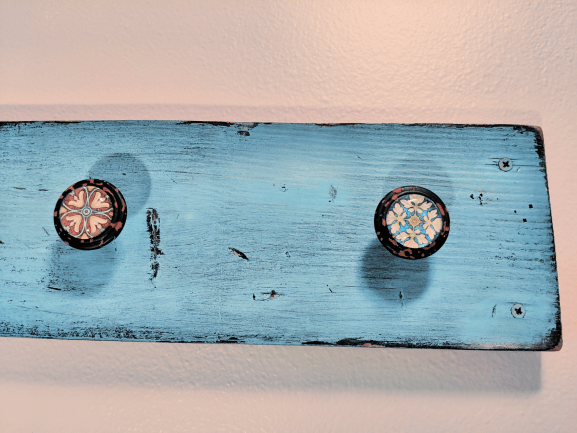
YES! This is the FUN part. Beat your board with a hammer not too hard, we’re not taking out past aggression here but get some dents in there, maybe see the original wood color in a couple places. If you go too far (hey it happens) just repaint with your base color.
I didn’t take a picture of the base color after I beat it, but this is a good picture to show how the board dented, see the long scratch? That’s a dent.
Step Five – Paint the Chalk Paint
With your chalk paint of choice, I used French Teal Folkart 2 oz, begin painting the board. Spread a little paint on a paper plate, or use paper cups cut down-a little goes a long way. With a nice brush, I use the Shorty from Home Depot, dab your brush into the paint and begin layering it on. Nice easy coat. It’s ok if it’s brushy or a little streaky, it gives it a fun touch. Let it dry to the touch – this won’t take long! 1 hour at the very most if you got it thick, 5-20 minutes if it’s thinner.
**TIP** Use a nicer brush to eliminate brush hairs sticking. You can see 6 Common Paint Brush Types here.
**GO GREENER** Keep the convenience of using a paper plate or paper cup but reuse it over and over until it’s fully built up. The old chalk paint won’t bleed it’s colors. Just don’t use white on a colored paint board.
Step Six – Distress it (again!)
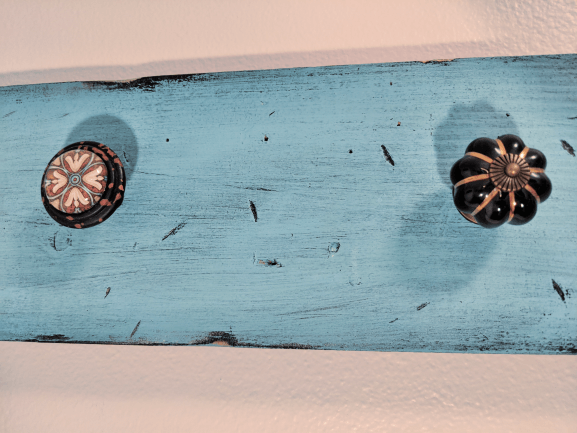
When it is dry to the touch and can be easily handled take an old rough washcloth and rub where you want it to distress. Chalk paint at this stage rubs off very easy and leaves the bottom color. To get a deeper distress use a 400 grit sandpaper to get both the top and bottom color off exposing the board color, you can see that at the bottom of this photo where I let the original board color show through.
Step Seven – Find your coat hangers!
I tend to do things backwards – this could be step one as well, but as I said sometimes it’s easier to have the board first. Decide how many coat hangers you want on your board and then head out to find old drawer pulls. I happened into a junk shop that had drawers of drawer pulls! I played with them all making combinations for a good hour, the sales associate got into it as well.
Step Eight – Drawer pull alignment
Get your drill out and ready with a set of drill bits. First we’ll mark where we are going to drill.
Eyeball how far you want the drawer pulls from each end of the board. Take into consideration jacket overlap. Once you have it penciled in, check the measurements on each end and make them match. For example if the left you marked at 4.25 inches from the end be sure the right is 4.25 inches from the end as well, your inner OCD will thank you (or anyone coming over with OCD will thank you, I will thank you). Assuming you have an odd number, find your center between these two points and mark it! These are your first 3 horizontal marks. Center any remaining drawer pulls in between these marks. I measured to make sure it was exactly the center, but you can also just eyeball it.
After marking where each coat hook will be horizontally, lets mark them vertically as well. Find the center point on your board top to bottom, mark this on both ends. Lay something straight between these marks just under them; use the measuring tape, a long ruler, a long junk letter – anything straight. At each horizontal mark, put a dot or an x where the vertical line meets it. These are your drill hole marks!
Step Nine – Drill the holes
Back out to your trusty sturdy surface with the overhang! (Bring a drawer pull with you) To determine the size of the drill bit needed take the screw out of the back of the drawer pull. Match the size of the drawer pull to the drill bit by simply just placing them end to end and side by side. If you hold it up and look at the screw with the drill bit behind it you should just see the drill bit. This will make the hole a little larger then the screw making it easy to put through and tighten down.
**TIP** Compare the size of your drill to the size of the screw by holding them vertically and looking to see how they compare in size. If the drill bit is smaller the hole will allow for the screw to grab traction (use this if your screw has a sharp end). If the drill bit is little larger then the screw this will allow your screw to slide in easily and be tightened from the back side (use this if your screw has a flat end on it).
Attach the chosen bit to your drill. The majority of drills you just simply hold the end of where the drill bit goes into, called a chuck, and if you press the trigger gently the chuck will stay in place and the hole will open or close depending on the direction you have it set to, allowing you to secure the drill bit in, these are called keyless chucks. You can also just twist the chuck with your hand not using the trigger if you have a lower grip strength. I can go into deeper detail if anyone ever wants a tutorial!
Place your (almost finished!!) board flat and slide the first couple of marks over the edge and hold it just like you did for the saw. Line up your drill bit to the mark. Mental check – Fingers, Toes, Legs! Anything UNDER the drill? (like your thigh?) Hold the drill perpendicular and firm. Press the trigger and apply Straight downwards pressure, letting the drill bit do the work. Tada first hole down – finish it up.
Step Ten – Attach the Drawer Pulls
Feed each drawer pull screw through the board and attach them by using a hand held screwdriver, mine were flatheads.
Step Eleven – Mount your coat rack
Find 4 screws that are long enough to go through your board and into the wall about an inch or two. At about 1.5 inches from the end, and evenly spaced vertically, use your drill (after changing the head to a phillips screw driver bit) to sink the screws in so they are just poking out from the back, about 1/4 of an inch. Repeat with the other side, making sure the screws match vertically, (OCD… )
Next grab a drill bit that is smaller then these screws, grab your level and with your board in tow head to where you want this to live. If you own a stud finder, perfect, see if you can find a stud at the end of your board to use. No stud finder – no worries.
Hold your board up gently to the wall so as not to mark it (yet) with the screws. Set your level on the top, once level push each end of the board into the wall, Hard! When you pull it away you should have four marks.
Taking your smaller drill bit, drill into each of these marks – if you hit wood great you’ve hit a stud! If not you will need wall anchors. I used a stud on one end and wall anchors on the other. I always do overkill on my anchors, the ones I used hold 100 lbs however I love them because they are self tapping – meaning I don’t have to drill out the hole and then try to pound them in with a hammer.
If you hit wood on one end, drill in to the end of your drill bit and repeat with the second hole. If you hit drywall only, use the self tapping anchors and simply using your drill’s screw bit head screw them into the wall – you can do all 4 screws with wall anchors.
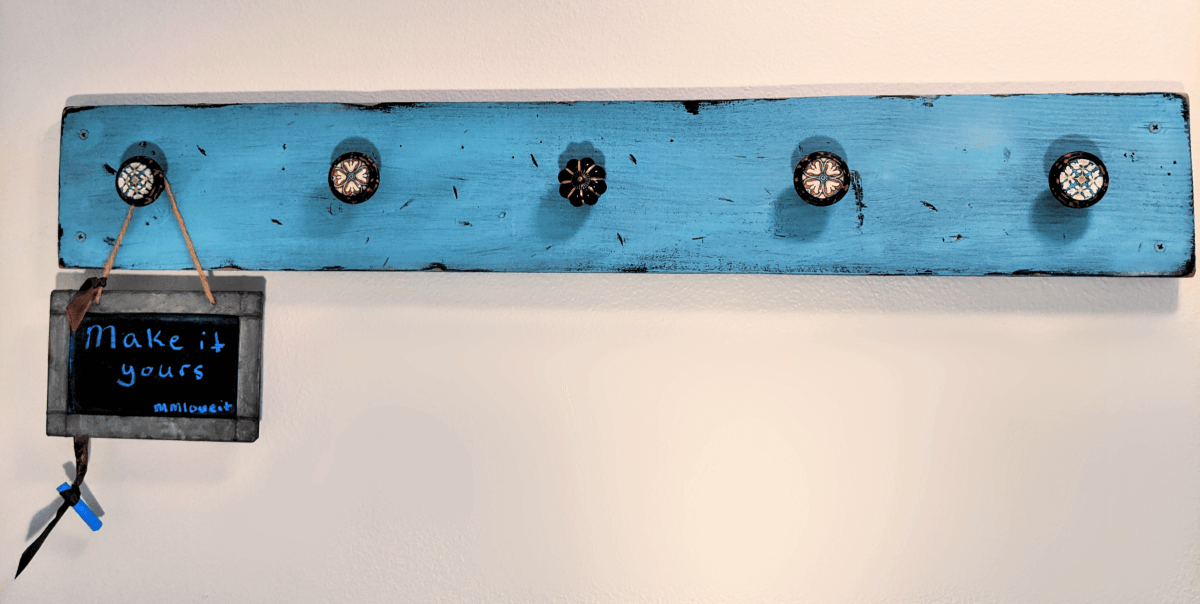
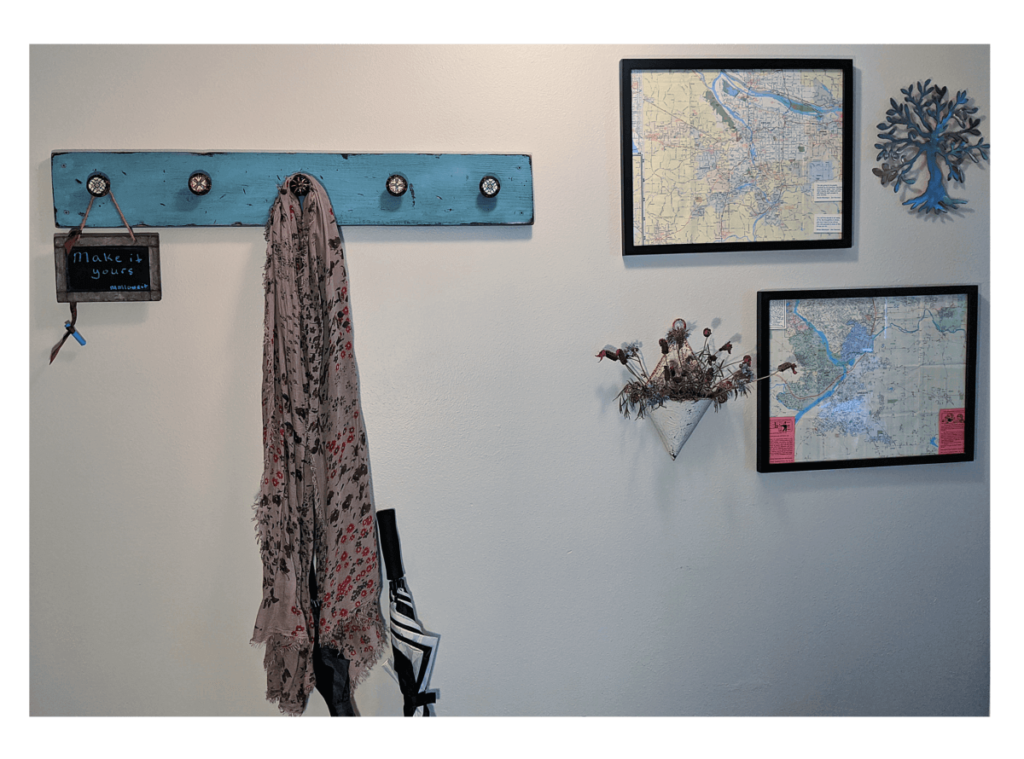
Finally take your board and line the screws up with your new holes. Screw each of them in and stand back and marvel at your creation!
- Pencil
- Drill
- Drill Bits
- Dry Wall Anchors
- Drywall screws – 4
- Measure tape
- Teal Folkart Paint 2oz
- Black Spray Paint
- Board
- Hammer
- Level
- Paint Brush
- Rough rag
- Drawer Pulls
- Skill Saw (Optional)
