
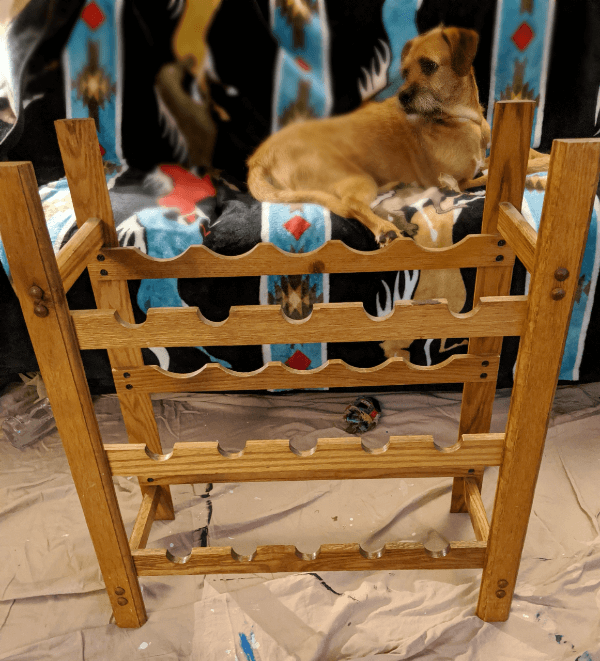
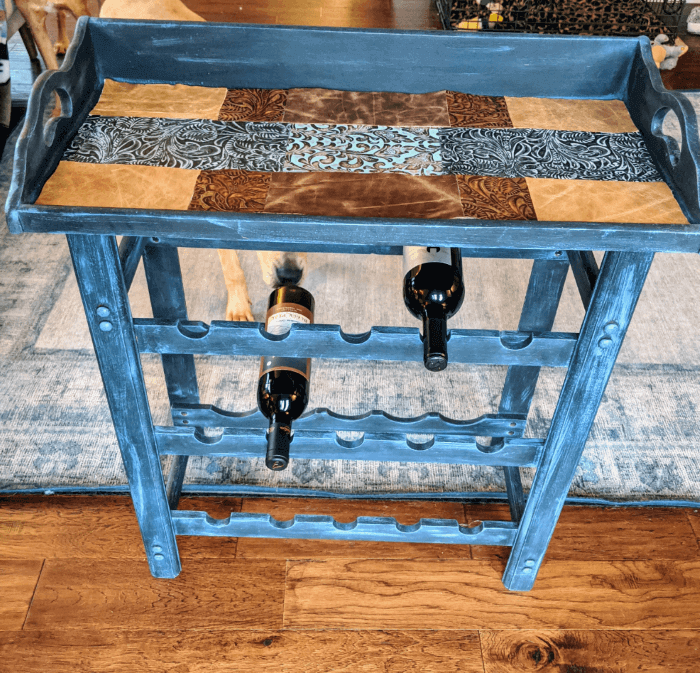
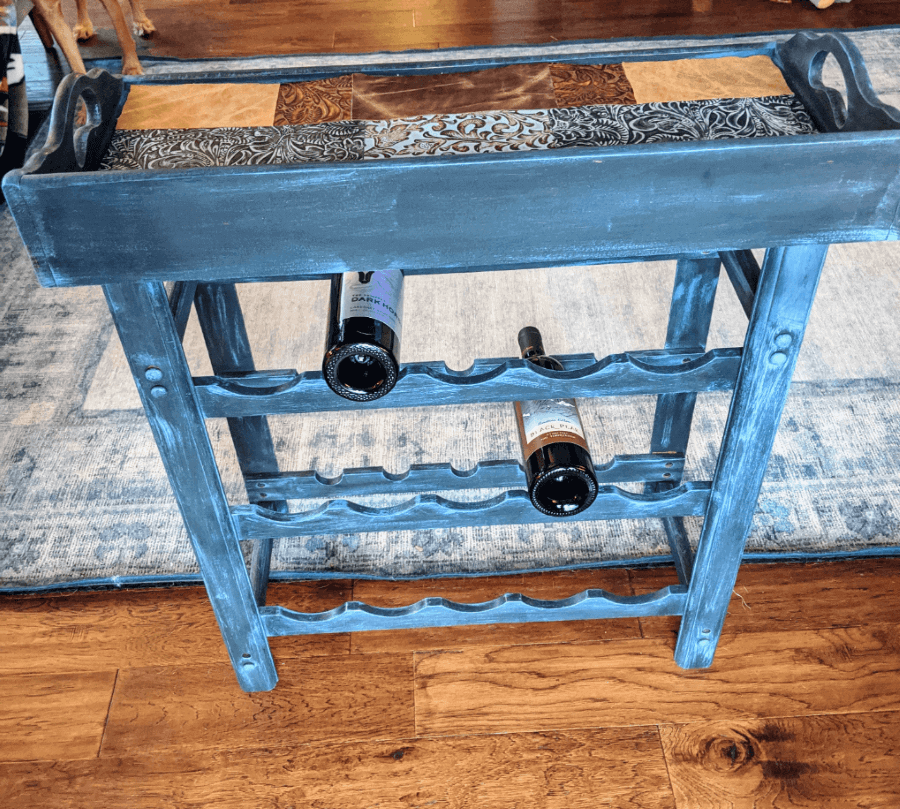
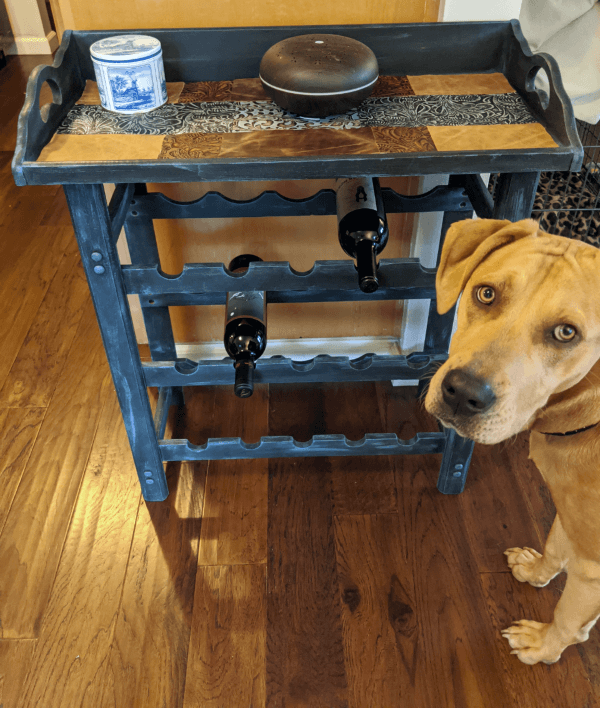
Here’s how to upscale a wine rack garage sale score! This old wine rack was found at a garage sale hunt. They wanted $20 for this rack and I talked them down to $10-oh yeah haggle for that price! I made this is a statement piece. Use a dry brush technique to get a rustic look but not a solid shock of color. I AM IN LOVE.
Step One – Prep your piece
Clean that item thoroughly to get rid of grime and grease. Yes you Must Prep follow this article to get tips on Prepping. Bottom line Dry and Clean is what it needs to be!
Step Two – Paint your base coat
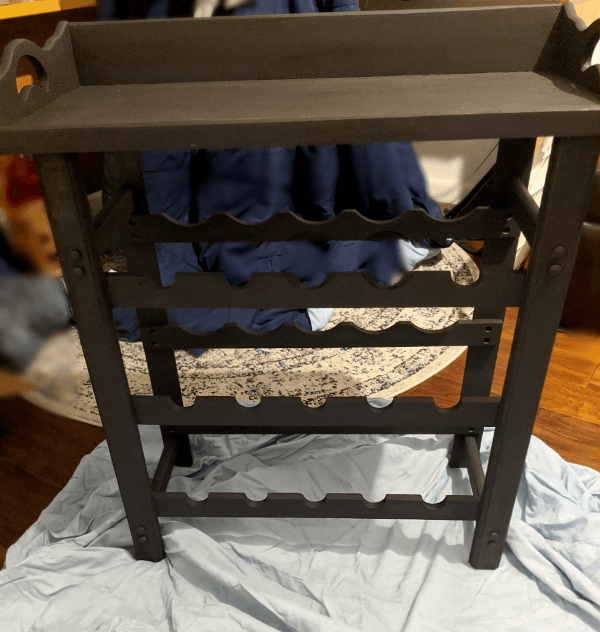
The options are endless! I chose black as my base coat because I have dark metal in my house. All of my furniture in my living room is old white so to make this piece stand out I went dark. You could use a white base or color for fun. Or a gold base with black, like I did with my Dry Brush Series of Ms in the hallway, to make it classic. Whatever you choose, make it yours and love it! (Or do it over again till you do!)
Using FolkArt chalk paint, 2oz bottle paint from Michaels. (this stuff goes a long way!). I squeezed a nice 50 cent piece size into the bottom of a paper cup and added about half of it’s amount in water, a 2 to 1. You’re looking for a consistency that drip off the brush but doesn’t run off the brush. When you pick the brush up the paint will slowly drip off, chalk paint out of the bottle stays on the brush.
Using foam brush to get a smooth base coat. See my article on Paint Brush Pros and Cons. Start covering your piece, long even strokes, you can always do a second coat so don’t worry if it’s streaky. Black covers so well a second coat was not needed for this.
**PRO-TIP** Adding water to chalk paint makes it go on fast and smooth
Put more paint and water ratio as needed, I used about half of the bottle. Let the piece dry.
Step Three – Pick your dry brush color
Dry brushing requires Very Little Paint, in fact the less the better. Which is great if you need to make a custom color.
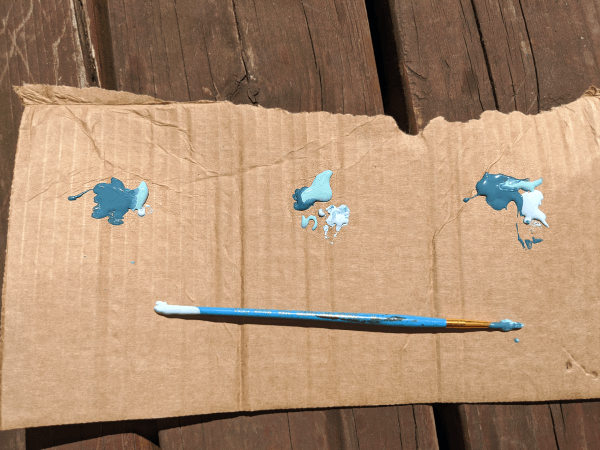
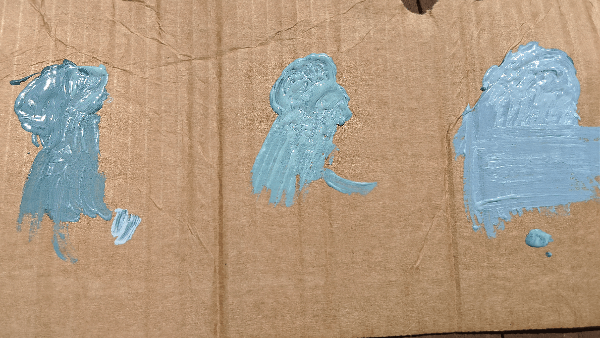
I wanted a peacock color blue, I have a lot of this dusty dark teal blue color and I just love it. I mixed Annie Sloan’s Aubusson Blue with FolkArt French Teal and a touch of FolkArt Glacier (light blue). Yes, these are two different brands of paint, however they are the same base. I practiced my ratio on a scratch piece of cardboard. This is not something you need to be precise about, this is just mixing some colors.
**PRO-TIP** You can mix paint brands as long as they are the same base-like water. Example any Chalk brand with any Chalk brand. Acrylic with Acrylic. Latex with Latex.
Don’t mix oil base with water base, like Oil Stain with Chalk Paint
On my carboard the first one is 2 parts Ambusson to 1 part teal and a drop of light blue. Next is 1 part Ambusson to 2 parts teal and 1 part light blue. The last one is 2 parts Ambusson to 1 part light blue and a drop of teal.
Once you have found that perfect color add the same ratio of paint, in a larger quantity, to your paint cup – do Not add any water we want this to be nice and thick. I seriously only tripled the tiny amount of paint you see above. When I say this takes Barely any paint, I mean it.
This is meant to be fun and easy! This is not scientific or requires precise measurements, find the color you like and go with it – you can always make it over!
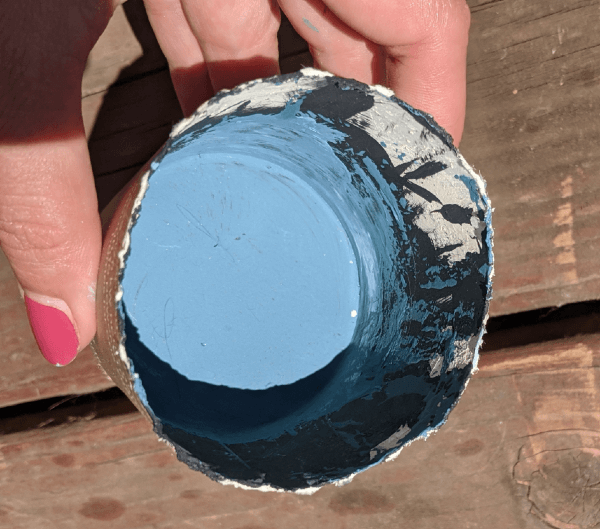
Notice the black and other colors in my cup? Be earth conscious, go green, use your paint cup over and over, the dried old paint won’t at all interfere with the new.
Step Four – Dry Brush
Dry brushing is a great way to get a shabby chic or distressed look without removing any paint. It allows the base color to show through a lot more then just distressing with sandpaper later.
There are two ways to do this. One is to leave a brush stroke look. This what I did on the wine rack. Two is to rub the paint in to blend it. See below in mistakes where I describe how Not to fix a mistake. See the Dry Brush series to see the other types of dry brushing.
Gather a paper towel, or more cardboard, your chip brush, a little patience and an artful eye. (Don’t worry! you don’t have to be artistic, I’m not!) I chose the chip brush because they are very rough and show more brush marks. Very gingerly tap your brush into you paint and then tap the paint brush on your cardboard or paper towel until it looks dry, this feels weird, wasteful and counter intuitive because you want to get color on your piece, but trust me start with a very little amount or you’ll just end up painting your piece not highlighting it. You can always add more!
**PRO-TIP** LESS is More with Dry Brushing
The goal it to dust the high points of the furniture. To add more paint to your brush you can go back over the parts you tapped off which kills that wasteful feeling. (Think green!)
With a whisper touch use a medium length sweeping stroke on a raised corner or edge going with the straight line. This will get you familiar with the feeling and how much paint actually shows up. Plus, bonus!, edges are always ok to be a little heavier with paint. How much or how little you sweep on is up to you – make it yours!
**PRO-TIP** Practice on your cardboard before touching the actual piece

Step Five – Mistakes
Not really a step but if a mistake is going to happen, it’s going to happen with dry brushing. The paint spatters, you get too heavy of a streak, etc.
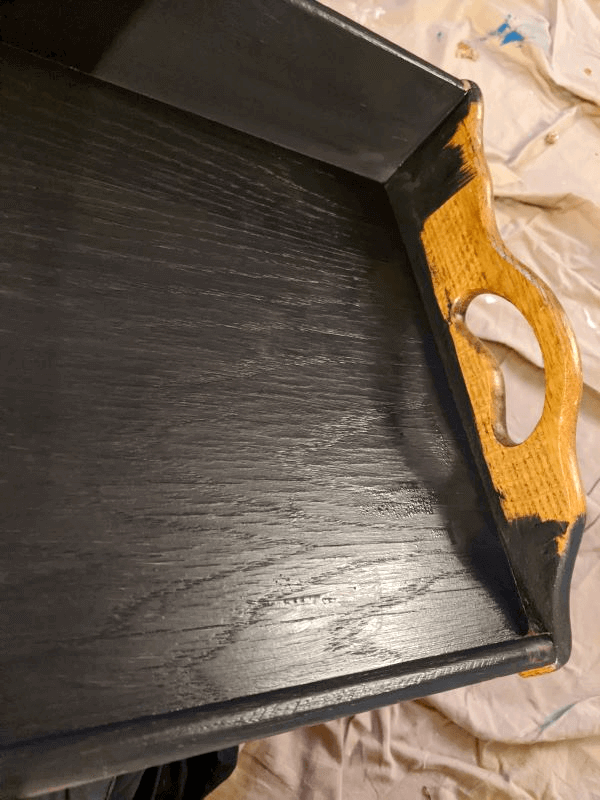
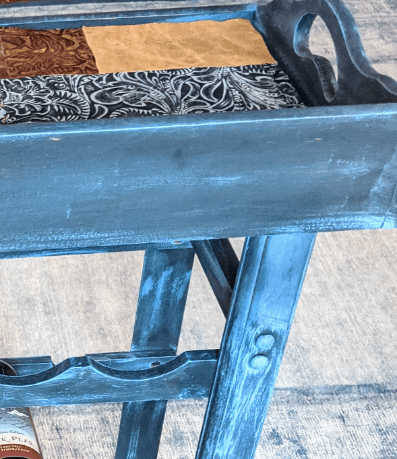
When you paint too heavily the answer is paint over it again with your base coat. However, prior to throwing in the brush (har har) and going back to base, I suggest leave the mistake. Move on and finish up the rest of the piece. Then you can decide if it’s an eyesore or if you can/want to live with it. In the picture below I started my dry brush at the top right corner, just above the two wood buttons, below the tray. I got too much paint on and without thinking I wiped it off. This gives you a blended dry rub look and not what I wanted.
I decided at the end since this is the back, and it’s probably only noticeable to myself, I didn’t need to paint it black and redo that little part.
Step Six – Wax
I will 90% of the time always finish my pieces with wax or some other clear coat sealant. I think it blends all of the edges together to give a store finished look and makes the furniture last longer.
Grab your wax brush and Annie Sloan Wax Clear. Annie Sloan herself gives a good tutorial on how to apply her wax. I took a 3 hours chalk painting class at an awesome little boutique that sadly is no longer in business. She gave the great tip of applying your wax in a ‘butter the bread’ fashion, back and forth vs one direction. Do not overload your brush, otherwise you’ll spend too much time wiping it back off. Once wax is applied the perfect amount should be seen not felt.
**PRO-TIP** See the furniture wax, don’t feel it
Once your wax brush has wax on it, wax brushes are usually flat, spread the wax back and forth. You’ll see the paint getting a little darker where you spread the wax. Move all around, looking in different lights, and make sure that you’ve gotten the wax everywhere.
Take cotton cloth and start wiping off the wax. Using cut up White T-shirts (colored t-shirts can leave behind color deposit), wipe in a circular motion or a window wiping motion will work. Continually run your hands over the piece to make sure you are getting the wax even. Once you lay your hands on it you’ll understand better what ‘see it don’t feel it’ means. You’ll feel the softness of the wax but not the stickiness residue of it. If there is a lot of wax on the piece it will come off in your hand and you will feel the mineral spirits and oiliness.
Let your piece dry and cure for a couple days. the wax will be soft for a good week and then harden up, so be careful when installing your piece.
Step Seven – Add embellishments
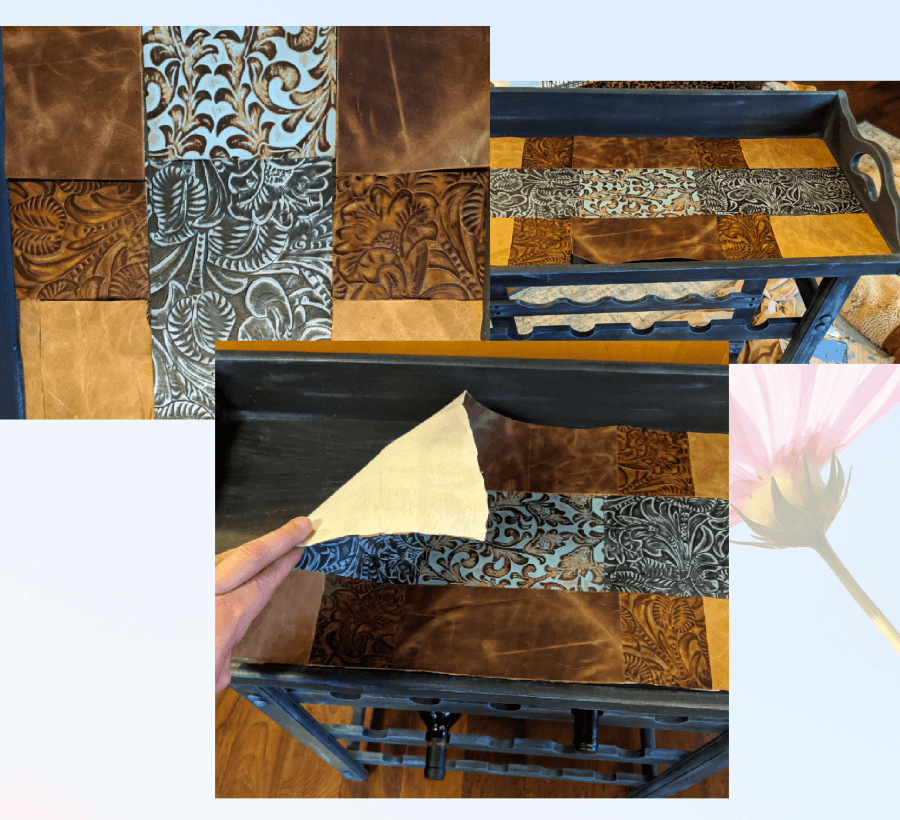
I decided the tray itself needed some extra pop and I happened to have a bag of awesome leather scraps. I created a fun place mat to fit into the tray!
I’m not going to go into details on this, only to say I used a car headliner spray adhesive to mount the leather fabrics to an old flannel pillowcase. Use what you have!
Step Eight – Enjoy! Now you know how to upscale a wine rack! (or anything else)
Supplies
- Orange Goop or Vinegar water solution
- Rags for cleaning and wiping
- Black FolkArt Chalk Paint, 2 oz bottle
- French Teal FolkArt Chalk Paint, 2 oz bottle
- Glacier FolkArt Chalk Paint, 2 oz bottle
- Aubusson Blue Annie Sloan, 4 oz jar
- Foam Brush, 4 inch
- Chalk Paint brush
- Paper plate or cup for paint
- Water
- Paper towel / cardboard
- Wax
- Wax Brush
- Optional – Leather scraps, flannel pillowcase, car headliner adhesive