Stage two part I in my Kitchen Renovation project. My goal for this project is to bring you helpful resources and list what things I needed to know the most going into the project. I don’t want to just regurgitate the same facts that are already out there.
After Stage one, which was small demo, electric upgrades and prep, it was time to do the backsplash. It is wise to tile the kitchen backsplash first before painting kitchen cabinets because of how messy this step is. (You’ll notice a few colors painted as tests on the cabinets, read my post series to see what I chose!) I am using a charcoal grout and grout stains things.
Here’s a list of 15 things I wish I knew before tiling my kitchen backsplash – good and ugly! I chose subway tile, I did a LOT of research, I had good base knowledge to start with and yet through the entire process I continued to research all the questions that came up. These are the things I wish I had known going into the project – especially #15, I almost had catastrophic failure, thank goodness I can be a nervous triple checking facts person…
- How easy tiling really is! details…
- Avoid crooked grout lines. Check that your counters are level all the way across. If you have a gap in the counters, like tiling behind the stove, level the top of the first row or you will get crooked grout lines. details…
- Don’t get hung up on your layout plan. Choose which side you want to look most uniformed and will give you the most uniform cuts. details…
- Tiling is MESSY. (From start to finish-all parts!)
- How easy cutting tile is! I would have made much harder cuts in the beginning and had some nicer outcomes. details…
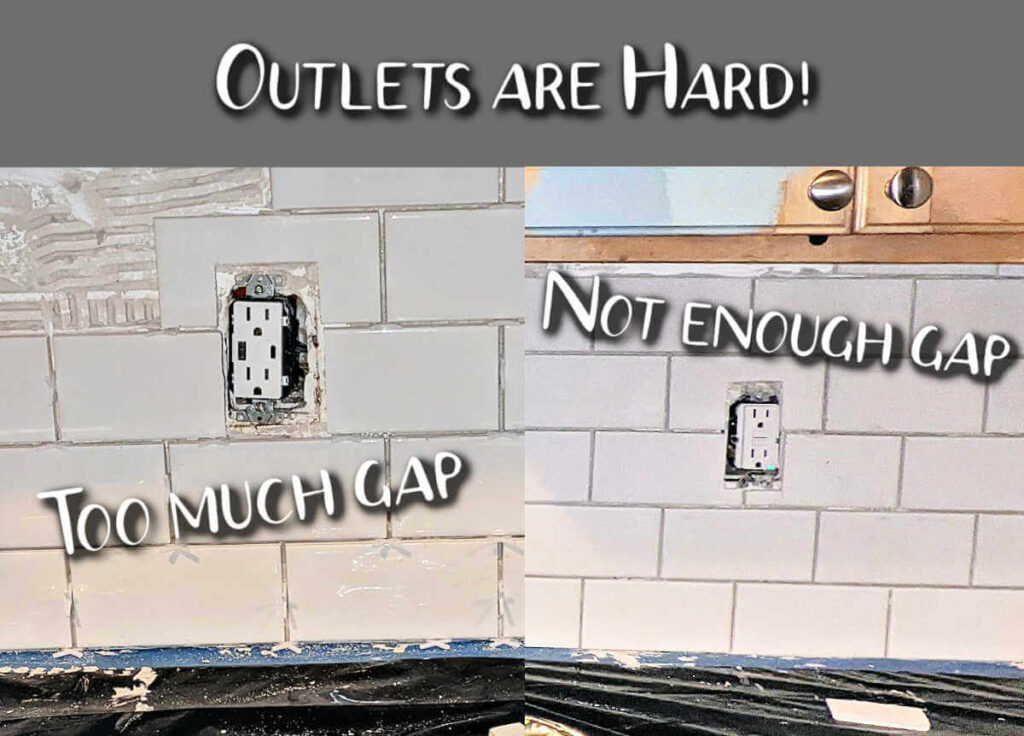
- Don’t cover the edges of your outlet boxes!
- Invest in a straight tile cutter, while cutting is easy, straight on anything is always hard (IMO)
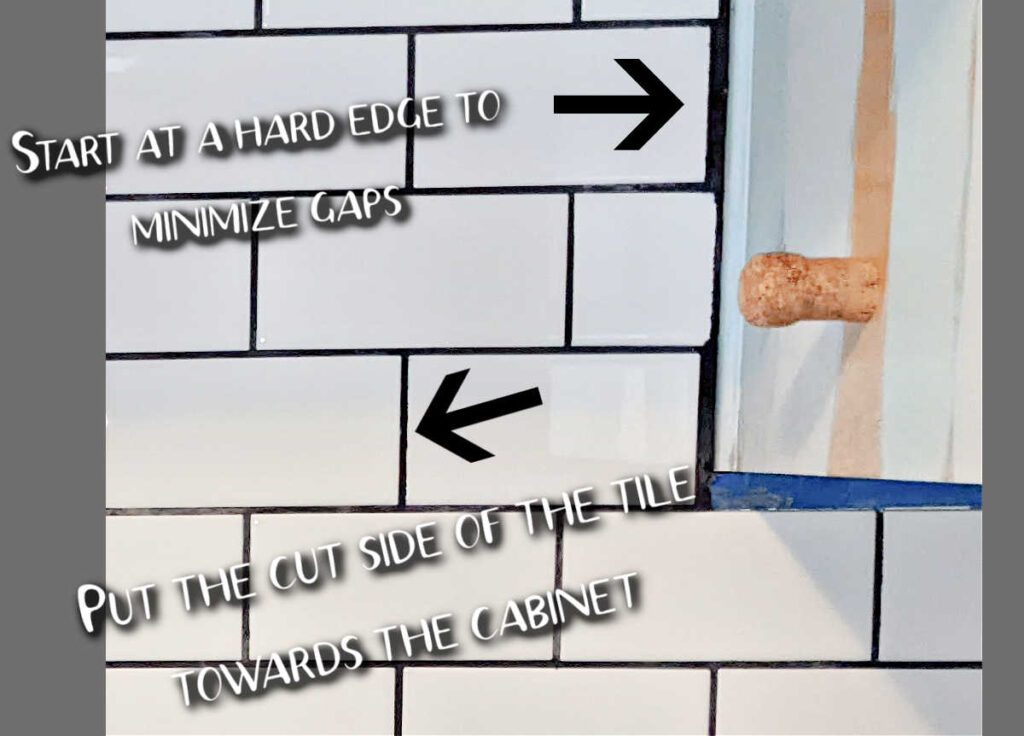
- Watch the details, always pair the non-cut side with another non-cut side of tile, so the washed grout between the tiles is uniform. details…
- Grout can be washed hard once it sets. Really press firmly with your sponge as you wash to get it uniform. details…
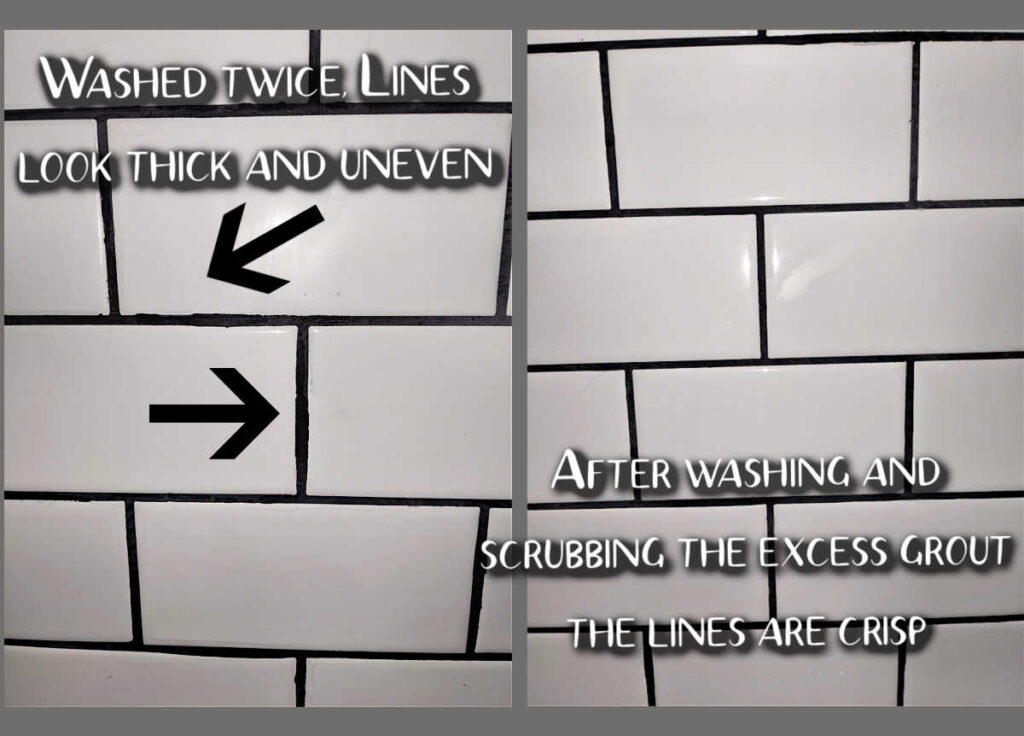
- Grout washing is ‘done’ when it matches the edge of the tile just below the bevel on subway tile. details…
- Grout washing takes a Lot of water, we refilled 2 five-gallon buckets I don’t know how many times.
- DO NOT POUR YOUR GROUT WASH WATER DOWN THE DRAIN – dump it outside or your pipes will clog.
- Wear latex or rubber gloves when grouting, my nails from the grout water were dry and flaky for weeks afterwards.
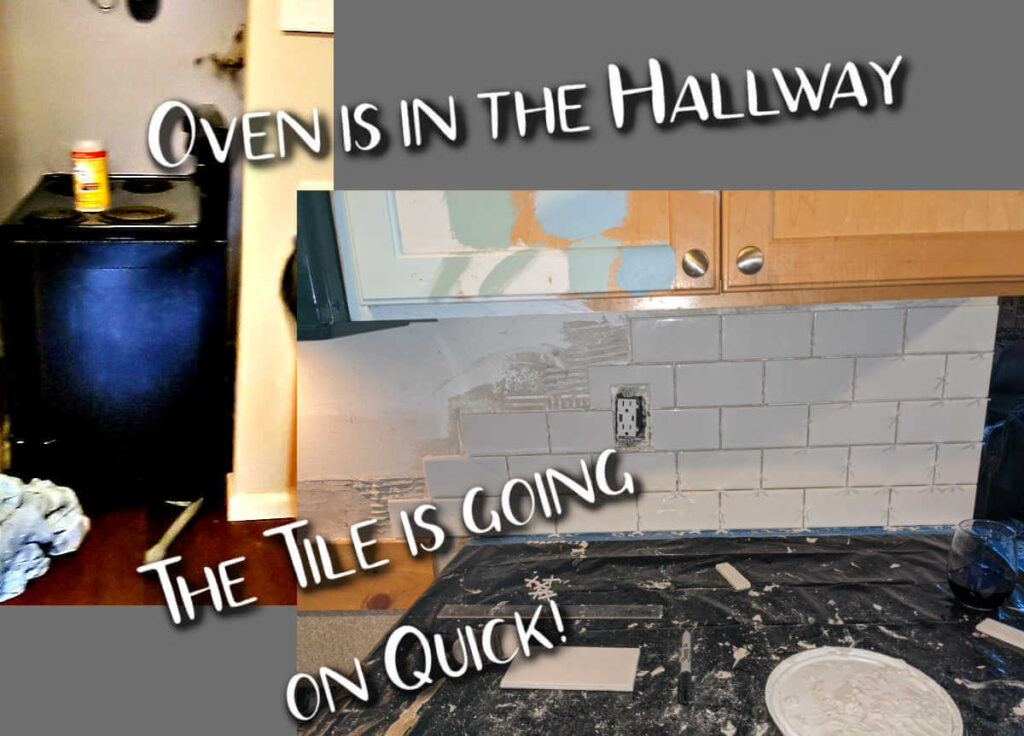
- Full 2.5 days of dedication. There is a bit of down time in between steps and some precise timing. Plan to not have use of your kitchen, and an oven range blocking your hallway. details…
- Use non-sanded regular grout! Don’t use the grout that already has the sealant built in, called Single Component Grout. Seal your tile later (it’s easy). Grout that has the sealant built in may SEEM like the way to go but you have less working time which means if you can’t wash the grout off fast enough it will stick like cement and never wash off leaving a nasty messy mess. details…
For a Complete list of all the supplies I used see Part II Tiling a Kitchen Backsplash for under $200! Relief from research, get full the supplies list here!
Tiling is Easy
Tiling is easy, but watch out for crooked grout lines. I researched You Tube, read blogs and more. I was nervous for this project, but I shouldn’t have been! The best video I found for tiling subway backsplash came from Home RenoVision DIY https://youtu.be/HIyIGJcJejU
One of the things he touched on in the video was unlevel surfaces. My two counters were not level, one was taller by just under ¼” – I found this out using my laser level and a long level. I found another You Tube video, this one from Mark Shows, which went into greater detail on unlevel counters, and it was super helpful to me! https://youtu.be/lID-aE515rI
In the video he cut the tile, I chose not to. My uneven gap was so small, and my counters were black therefore I chose to just shim up one side of the tile taller then the other. In other words, on one counter the tile sat right on the countertop, on the other side it had a space under it. In the empty wall space for the oven I temporarily screwed a board that was even with both sides and leveled it. By doing this my grout lines were straight and I tricked the eye to not see the gap in the other countertop. I used white caulk to fill in where it was wider.
After I got my kitchen prepped and got the first tiles cut I was shocked at how fast and easy it was to lay the tiles! I can’t wait for my next tiling project!

Cut Tile with Ease
Another shocker was how forgiving and easy cutting tile is. I purchased a tile snap cutter to aide in straight lines, very easy and effective. I own a Dremel with diamond grinding burr set which made it so simple to shape the tiles! I also have a DeWalt Angle Grinder that I put a diamond blade on and that sliced through the tiles like butter.
Around the outlets and cabinets I put the tile close to or in front of the space it needed to be, drew on it with a sharpie and then cut using the Dremel or the angle grinder. If it was a larger cut the angle grinder worked better, the Dremel was best for shaping and small cuts.
When you are fitting the tile to cut it keep in mind your spacers, where the next tile will be and how it lines up with the tiles above it (you can see details on this in the Home RenoVision DIY tile expert’s video linked above). Also – do not cover the outlet cover! But if you do, you can use the Dremel and gently chip away until it’s free.
I had to do more work on one of the electrical outlets as it wasn’t flush when I put on the cover and the electrical outlet box, including the outlet screws, had been covered by the tile, so I took the time to cut it back. (Do turn off the electricity to this outlet for safety reasons when you cut back the tile). Safety glasses on my face I very carefully, with my Dremmel and a thinner diamond burr, sanded off the edge of the tile until I was satisfied.

Details Matter in your Kitchen Backsplash!
Watch the details. Details matter and in the end will give you a cleaner look. Below I’ve pictured some of my detail mistakes. Unless someone scrutinizes your tile, they won’t notice, but I do…

Start at a wall joint edge so you don’t have miniscule cuts or large grout lines as you see above. The other side of the wall ended behind the refrigerator, so had all the cuts on this side been even and started on the side shown (against the cabinet) the lines would have been cleaner.
When are you ‘done’ washing the grout?
I watched Home RenoVision DIY https://youtu.be/dxPmaMQYkOU and Brent Darlington https://youtu.be/ifd8EadmB7Y over and over and I felt good as I went to grout. BUT as I washed the grout color just kept running out, and I had thoughts of I am washing it all away, it’s getting too thin…I don’t know what I’m doing! The sky is falling! Actually thought, I had grouted too thick and had a lot more to wash off then I thought!
The grout for subway tile should be below the bevel and even with the edge. I really had to scrub fairly hard on a few places towards the end, I was towards the end of the working time. Read the back of the grout bag and follow the instructions, it was very easy. I think I probably washed 5 times. Wash, Wash, Wait, Wash, Wash, Scrub. Thank goodness I didn’t get the grout with the sealer in it, or I would have been ripping all of the tile off!
Non-Sounded grout vs Single Component Grout, aka grout that you can purchase that already has the sealant built in. This video from Home RenoVision DIY goes into great detail on the two different types of grout. Just before the grouting process I re watched the grouting videos and at the store had deliberated over ALL of the choices of grout. I finally chose the more expensive one with the sealant built in – less steps right? WRONG
I am SO HAPPY for You Tube suggestions!! Suddenly the video “This Grouting Mistake will Ruin Your Tile Job” https://youtu.be/cOnvsU0Q-eg popped up and WOW am I GLAD I watched. Had I not, the messy grout lines I point out below would have just stayed the way they were…forever and I might never have been happy.
Here’s a good picture that shows my grout after 2 washings (initial and the second round). I wasn’t happy with how choppy it looked, then I realized I needed more off! I kept washing until I was satisfied. After the grout dried, I also to a razor blade and just scraped and cleaned up a few line edges as well.

The finished product speaks for itself, I am so happy with my DIY subway tiled kitchen backsplash!
